


Next we install SQL Server Express. Begin by running the downloaded executable. Most of the installation is pretty self-explanatory; just keep hitting next. When you get to the feature selection, don't bother installing Reporting Services. However, go ahead and install the Connectivity Components and Management Studio Express.
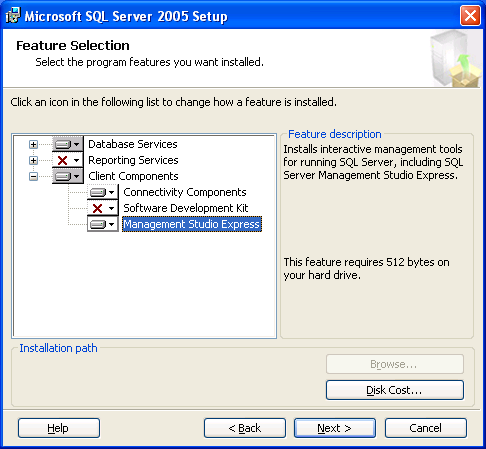
Install the Features We Need
For the authentication mode, be sure to choose Mixed Mode and set a memorable SA password. If this machine will be facing the general Internet (NOT recommended if you don't know what you're doing) make sure the password is secure. If this is for local development only and you're hosting your website with a web host that supports C#, then the SA password doesn't really matter too much so long as you don't forget it.
Additional installation options can be left at their defaults. Once the installation has been completed you can reboot the machine as instructed by the installer. Congratulations! Barring any major mishaps, you now have a fully functional development environment for C# websites.