


Deselect the small portion of our ceiling. We no longer need to modify that part. Next, we're going to make two cuts. These will originate on either side of our flag, and then spread out until they come in contact with the far wall. The eventual size of the center brush will match the size of our balcony. Once more, a picture to help clarify what I'm saying.
The second cut
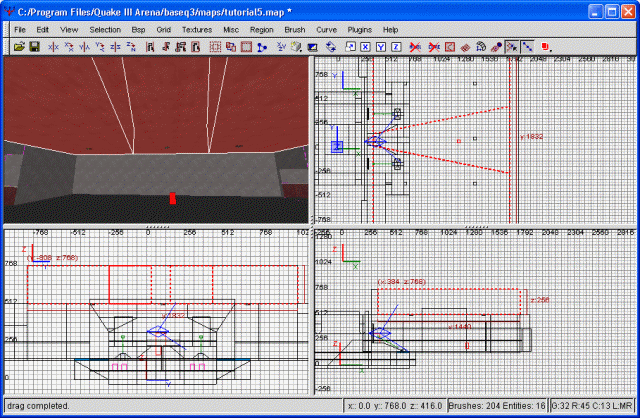
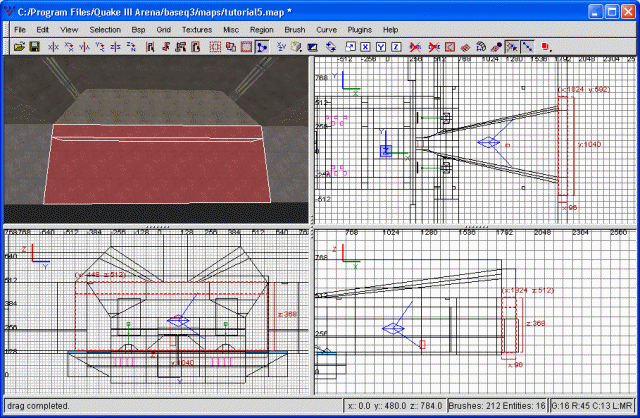
So far, so good. Next, we're going to deselect the two sides of our ceiling, leaving only the center chunk that's radiating away from our flag. With this highlighted, I'm going to chop it so that it's like an inverted ramp. IE, lowest by the flag, the progressively going higher until it hits the far side. Just to be absolutely sure I'm not losing you, still another screenshot.
The third cut
You may have noticed we have a free-floating light now. Well, we'll leave that there for the time being. Once we've finished with our cutting, we'll need to realign this to properly match the ceiling. However, first the hard part.
We've been doing a good deal of clipping over the last few tutorials, but we've skipped over one very powerful, but also very complicated, procedure. What we've been doing is two-point clipping; ie, we select two points, and the clip line is drawn through those. However, three point clipping is also possible. This can allow the clipping line a great deal more freedom. This is what we're going to use now.
The idea is to clip the ceiling so that it slants inward at an angle. This will provide a much more natural flow to the ceiling, in addition to supplying some much-needed variety to our otherwise boxy flag room.
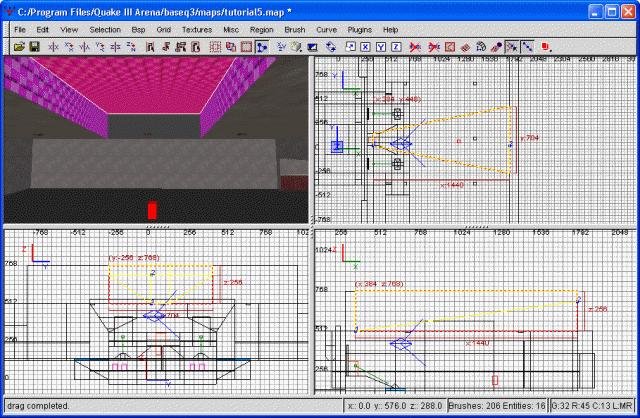
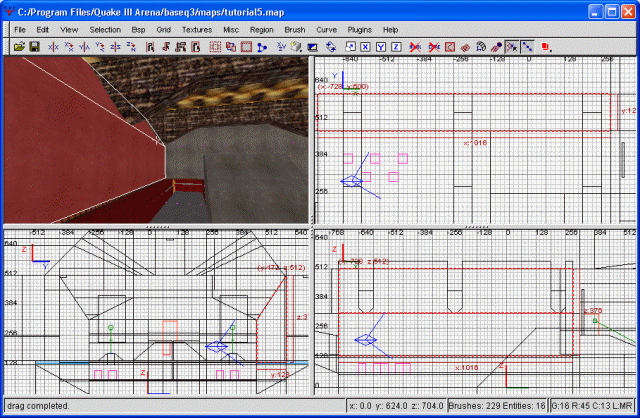
We'll begin by selecting one of our ceiling chunks. In this case, I've selected the northmost one. Using the bottom-right view window, I'm going to two-point clip it so that it's even with the center ceiling brush. This is not the effect that we're looking for, but it's a start. Once we have that taken care of, click once more. This will place the third clipping plane.
Honestly, there is probably some rhyme and reason as to how this thing works. At times, I feel like I almost understand it, and then suddenly it ceases working the way I expect it to. If you hover your cursor over any of the clip points, you'll notice the cursor turns into a plus (+). At this point, clicking and dragging will allow you to reposition this point. I suggest leaving the first and second points alone...these are already accurate. Try dragging around the third point, and seeing what effect it has on your cut. I finally settled for a cut that gave me what I wanted. Below is a screenshot to illustrate precisely how I had my points positioned to achieve this cut.
Three-Point Clipping, the mystery meat
Alright, we're half-done with our three point clipping. Now we just need to clip the other side the same way. This, unfortuanetly, is the hardest part. However, I've managed to match it up as much as I can. Whatever inconsistencies we may end up with just adds personality to the level, right? Right. Once we've accomplished this step, let's go ahead and fill in the open portion of the wall. This is rather simple, of course. Just make a brush and clip it so it fits in the hole. No three point clipping required for this task, thankfully.
I went ahead and textured all the new brush faces with our ceiling texture, base_wall/patch10. Remember our free-floating light? Well, I've decided to get rid of that entirely. Though it worked great for lighting up the flag room floor, it didn't light the ceiling up much and I'm afraid it really wouldn't fit our purposes. Additionally, in order to make it flush with the ceiling, it would have to be cut at a pretty odd angle. This is something you should try to avoid as much as possible. If you cut something at very shallow (or steep) angle, sometimes the rendering engine doesn't know quite what to make of it...so it doesn't render it. This will cause entire brush faces to become transparent, or possibly cause GTKRadiant to generate strange error messages.
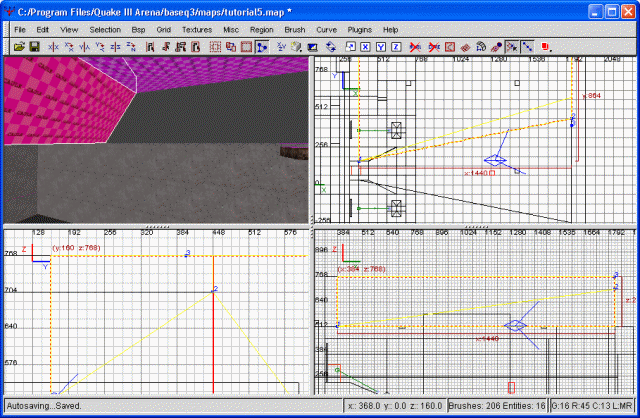
So, rather than deal with that potential mess, I've decided to do some clipping. I'll be clipping the brushes we formed with the 3-point clipping exercise above. I'll be making a thin line again, like we've done in numerous areas. This should light up the area nicely. I've settled on the base_light/light5_5k. The rotation of my 'southern' light strip is 78 degrees, and 277 degrees on the 'northern' side. Both have a horizontal stretch of 1.25 and a vertical stretch of 2. Note that the rotation is completely dependent on how, exactly, you cut your strip. These are simply the values that seemed to fit best with what I have. Following is a screenshot of the clip I used.

The light strip
If you were to launch this map into quake now, you should notice the 5k light was more than enough to adequately light the area. In fact, it seems a bit much, to be honest. I've decided to downgrade the texture to light5_3k. This will make it a bit darker. Unfortuanetly, I have to go through the process of realigning the textures again, but this takes very little time, especially since I already know the rotation I'll need.
Now for some quirkiness. If you compile the map at this point, you will notice a decidedly odd effect of our light... it's entirely black. However, the patch wall we made (to fill in the hole we had, I'm sure you remember) it brightly lit. Well... I really like this effect, actually, so I'm keeping it. After all, we have the desired effect... the area is lit up, and the patch wall (which we will be turning into a doorway soon enough) is lit up rather brightly. The black lights just look kind of cool.
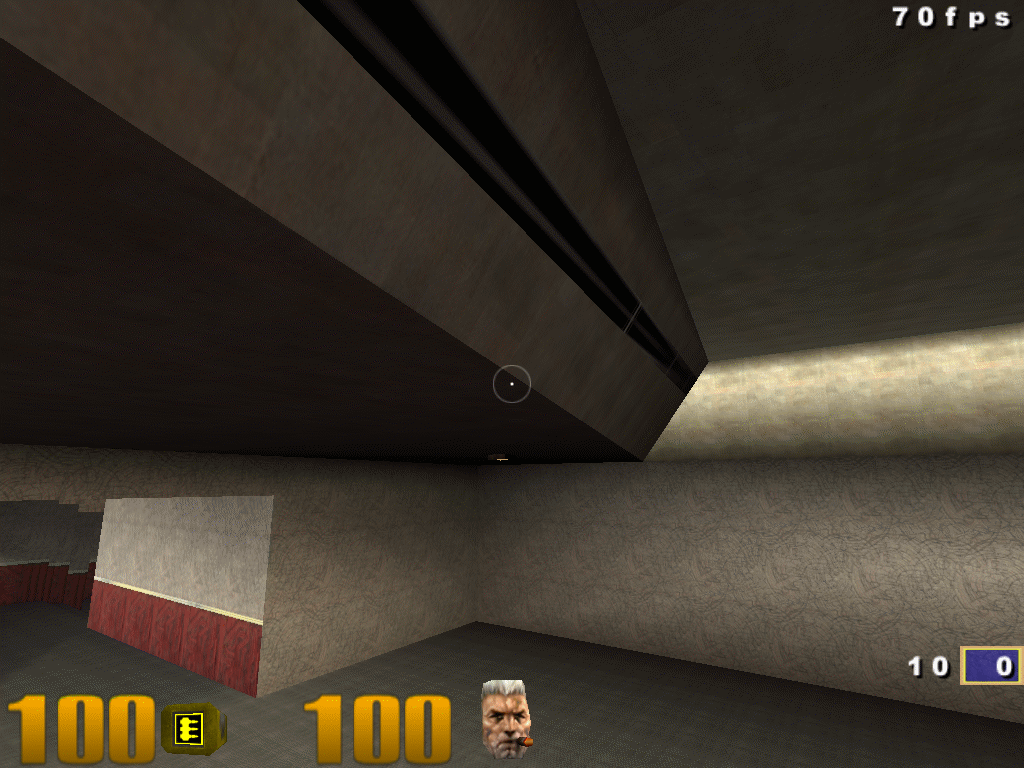
An odd shader bug, I suppose. Click for a full-screen version.
Regardless, the end-result works for me. So, let's move on, shall we?
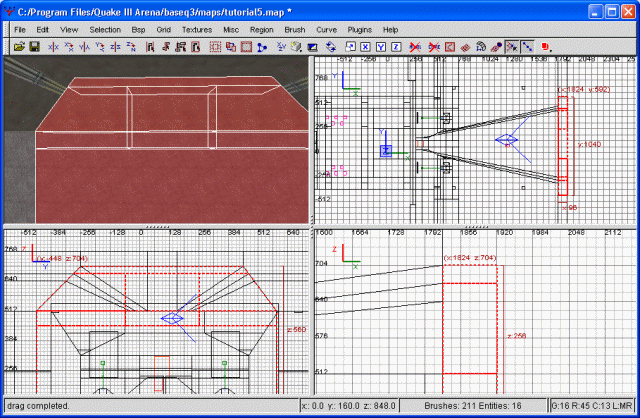
The next step is to make a balcony entrance into our flag room. The patch wall we made is too small to really accomodate an entrance, so we're going to begin by cutting our actually wall (the area below) vertically twice. We'll make the vertical cuts even with where our ceiling stops sloping and goes horizontal. When we're done, the patch plus this center chunk of wall will line up evenly, making a house-like shape. Next I'm going to cut the actuall wall horizontally once, at the approximate level I want the bottom of the doorway. This will help define the floor of our balcony, so leave enough space to allow adequate player movement. However, don't make it too large, either. We don't want it to compete with our huge left passage as a good entry point into the flag room. I'm making the cut just a little down, not much at all. Here's a screenshot to show what I've done.
The first steps toward our balcony
You may have noticed I made the cut directly on a major gridline. I did this mainly because it makes later manipulation easier. Regardless of where you decide to cut, go ahead and deselect the lower part of the wall. We're done with that, for now at least. Instead, go ahead and keep the upper porton of this wall selected, and also select the patch wall above. Now we're cutting the patch wall horizontally across where the top of the doorway will be. Though you could just leave it as it is, I find that making the doorway flush with the ceiling seems to take away from its charms somewhat. The next thing we're going to do is deselect the topmost brush, while keeping the other two selected. We're done with this one, as well.
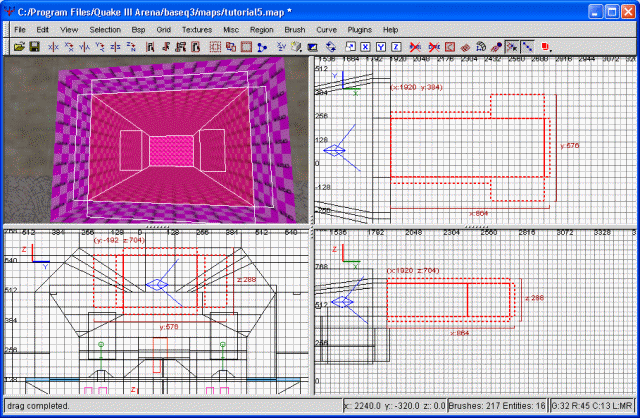
Finally, we're cutting the remaining brushes twice vertically to define the left and right sides of the door. The exact size is up to you, but keep it reasonable. As mentioned earlier, we don't want to make this entrance too convenient. Instead, make it roughly big enough to fit a handful of people through side by side. This gives manuevering room somewhat, but seriously limits the effects of a massed charge. I've decided to use the flag stand as a guide. This is, roughly, the size I'm aiming for. I'm going to post a screenshot now showing all the cut peices. Kind of reminds me of something from Tron.
Balcony clipping
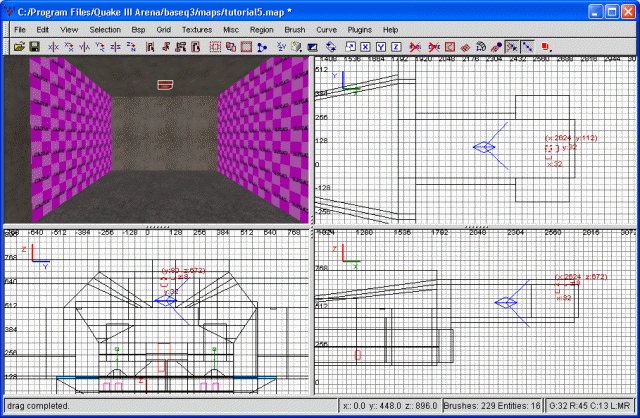
Ok, let's go ahead and delete the brushes in the center. The resulting hole is our doorway. With that out of the way, let's go ahead and make this into a passageway as well. I'm going to make it relatively short, and then turn into a T junction. This should be fairly easy to do, by now, so I won't waste alot of time explaining. However, I will gift you with yet another screenshot of the finished product.
The balcony tunnel
You may notice the two oversized brushes I have at the end... these are plugs, rather than walls. Their sole job is to keep the void at bay so I can look at my new creation. Of course, with the walls consisting entirely of caulk, I wouldn't be seeing much. I'm going to go ahead and texture the lot. Please note that requires some clipping of our doorway, in order to eliminate overlapping textures. This, too, should be almost second nature by now.
We will also need a light in there, otherwise the passage would be close to pitch black. Rather than do more strip lighting along the wall, I've decided to simply put a single ceiling lamp in the T intersection. Basically, I'll be taking one of the lights on the flag room ceiling and copying it over there. After finishing this, you should have something similar to the following.
The balcony tunnel is complete
And now we face our first compiler bug. This has probably been there from the start, but I just now ran into it. This is precisely why you must test your map, forward and backward. You must shoot every surface, jump at everything you build and test every single entity to make sure it's working as it's supposed to. Interested? We move back into the spawn room. Remember the walls we created? Specifically the walls on the sides of the spawn room, which we clipped at the top to angle outward? Perhaps a screenshot will help.
The first bug
Try compiling the map and running it, in either regular quake or WFA. Now jump (or grapple) toward that wall. If you're in regular quake, or have a nonflier/nongrappler, you can jump from the ramp we made so long ago. If you'll notice, you'll pass THROUGH that wall, and start an eternal fall through HoM hell. This is a bug. If there truly were a hole there, we would have gotten leak errors during map compile. These walls SHOULD be solid, but they aren't. Now you may wonder what we should do about it.
Our first option is to ignore it. Not a good idea. Ignoring the problem will not make it go away. I thought I'd mention it just for posterity's sake.
Our second option is to delete the wall and draw it over again. This may work, or it may not. Personally, though the wall is relatively simple, I don't especially relish deleting the whole thing and rebuilding it from scratch. Especially since there's no telling if it would actually work. Just for the hell of it, I did just this with the 'southern' wall. And, lo and behold, it actually worked.
The final option is to use a clipping brush. I've decided to use this method on the 'north' wall. Basically, I just took the malfunctioning brush, copied it, pasted it, then textured the whole thing as common/weapclip. Unlike fullclip, weaponclip causes weapons (bullets, rockets, grapples, grenades) to react to is as well, not just people. This will make it look like the wall is just like any other.
Does this kind of thing happen often? Honestly, I've had something odd like this happen on every map I've made. However, usually it's only a wall or two, and never especially rampant. Which method is best used to deal with this issue? Well, not the first option, definetely. Redrawing the brush is probably the best idea... this minimizes on excess brushes, for instance. However, cloning and textureing the brush with weapon_clip is by far the quickest and easiest method. As reitrated many times in the past, brushes on top of other brushes is a bad idea. The fact that one of the brushes is transparent may help mitigate performance issues, but at the very least it will increase compile times. I'm not sure what the performance hit will look like, though.
It's good that we ran into a bug at this stage. You should be familiar enough with gtkradiant now to be able to take these bugs in stride. If something isn't working right, try to fix it. If you can't fix it, work around it so that you EFFECTIVELY fix it. For instance, putting a weaponclip brush over it. The most important thing, don't panic. And don't even THINK about throwing a map out because you've encountered some sort of bug. Not until you have taken the time to exhaust every other possible avenue to fix it.
That concludes this tutorial. I hope it was informative. Grap the .map file below if you like to follow along with what's been done.
The map file for this tutorial.