


However, before we do that, the more attentive readers may have noticed we've got alot of hidden textures now. What am I talking about? Well, if you read the previous tutorial, you may recall when I was talking about caulk. Basically, you want to have NO textures anywhere that people will never see. This only slows down your map and can cause some serious performance issues. In this case, we have floor and wall that is forever obscured behind our concrete ramp. So...how do we fix that? Why, the clipping tool, of course.
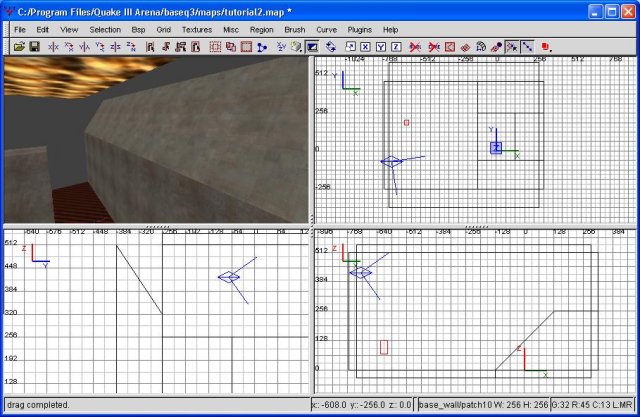
We're going to start off fixing the wall first, then move on the the floor. The first thing we need to do is select the wall behind our concrete ramp. Once you have this selected, hit 'x' (to turn the clipping tool on) and cut the brush horizontally across the top of the ramp. Allow me to demonstrate.
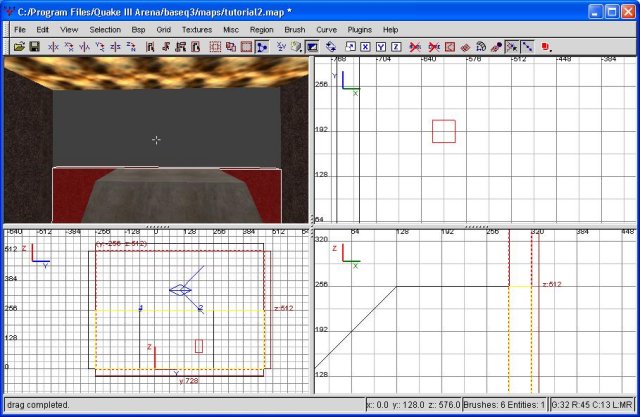
Cutting the wall
I used the side view (bottom left) to cut the wall exactly even with the top of the ramp. But how do I keep both sides of the wall? Simply hit shift-enter, and this will keep both sides. However, our single brush is now two brushes. Next, let's deselect the top brush. Do this by shift-clicking on it in the viewport.
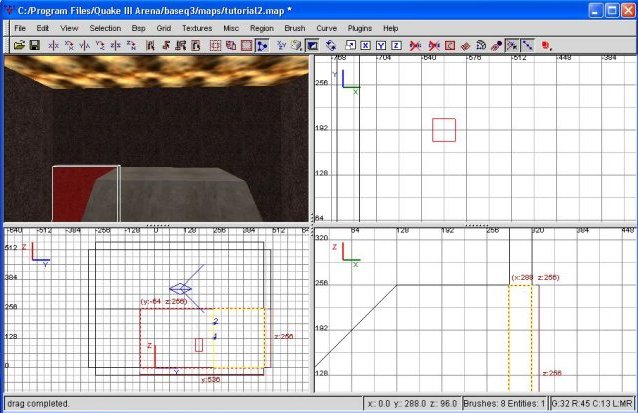
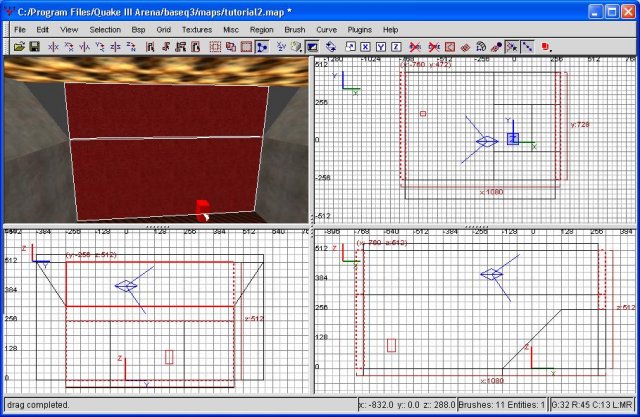
With only the bottom portion of the wall selected, we're going to cut it again. You may have noticed our clipper is still turned on, so there's no need to hit 'x' again. I'm going to cut the wall on the "left" side of our ramp, as seen from the side view. To demonstrate, yet another happy screenshot.

Cutting the wall again
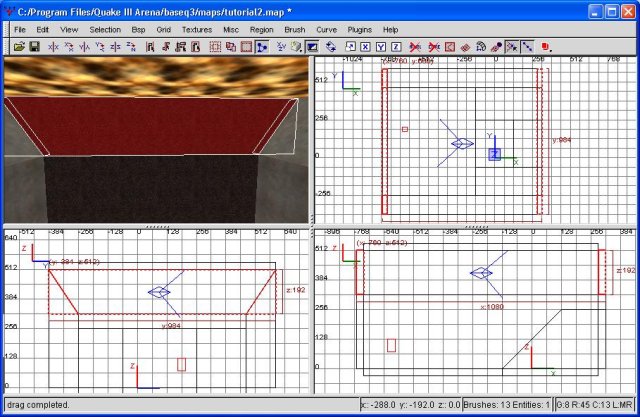
Once more, we want to hit shift-enter in order to keep both sides of the wall. Next, deselect the smaller (left) half...that's exactly how we want it. We're going to do the exact same thing to the other side of the remaining brush. Basically, what we're doing is cutting out a section directly behind our ramp, thereby eliminating our texture problem. Just to be sure we're all on the same track, another screenshot follows.
Cutting the wall one more time
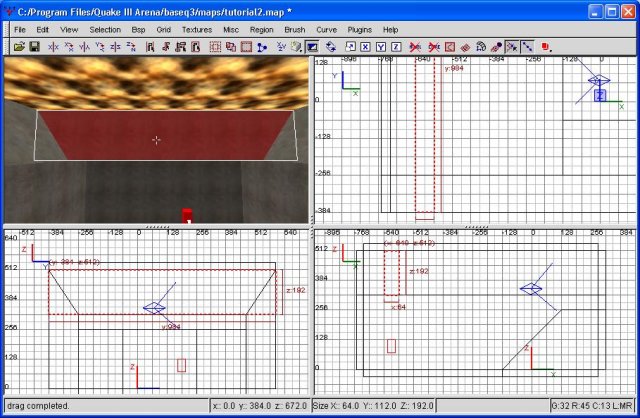
With this last cut, you have a choice. Either you can shift-enter and keep both sides, or simply keep the side that's visible. I've decided to keep both sides, just in case I decide to place a room on the other side. Instead, I just deselect the far right brush (in our side view) and then texture the middle brush all caulk. Whatever way you choose, we no longer have to deal with a texture being drawn and never seen. The floor is next.
At this point you should have a fairly clear idea of what we're doing. For reasons of brevity, I will assume you have a fair understanding of the clipping tool, and thereby keep this portion short. We will be doing alot more clipping in the near future, so it's important you master this skill.
Regardless, let's begin. Using the top view, I'm cutting the floor "vertically" where the ramp ends. This will chop off the portion we don't need to modify. Following that, we're going to cut the plane "horizontally" (still using the top view) along the top and bottom borders of the ramp, thereby isolating the portion directly beneath the ramp. To help illustrate all this, yet another screenshot.
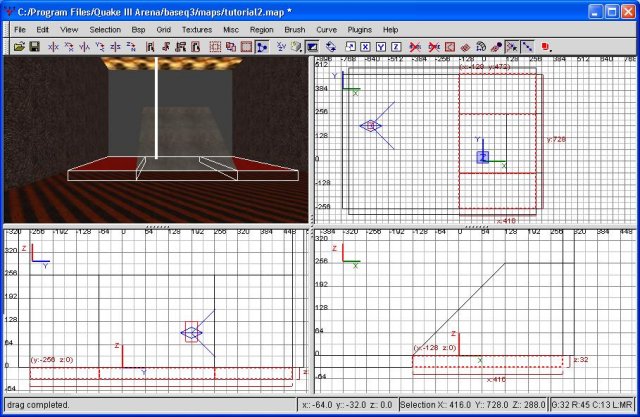
Cutting up the floor
I hope that you're getting the hang of the clipping tool now. Once more, you have a choice of either deleting the brush below the ramp, or just texturing the whole thing as caulk. Personally, I'm keeping it. This will only add to compile times, but it shouldn't affect the end product at all.
Alright, with that out of the way, let's work some more on sprucing up the spawn room. Let's begin by doing something about the walls. Straight, vertical walls are kind of boring, so let's do a simple alteration.
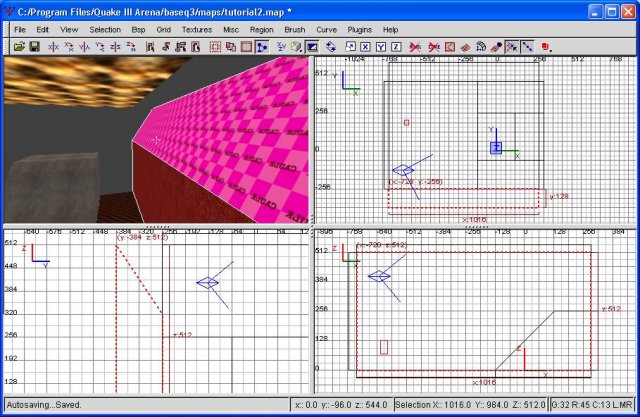
To begin with, we're going to enlarge the two "side" walls (top and bottom walls in the top view). Do this by selecting one, then dragging it so it's wider. You'll need to do this one at a time. Allow me to demonstrate what it should look like with yet another screenshot.

Enlarging the walls
Once we have them thick enough, go ahead and select one or the other, and using the side view (bottom left) we're going to cut it. I'm going to make the cut go from the top, outside corner down several grid units and to the inside. If that sentence confused you, simply gaze at the following screenshot for clarification.
Cutting the wall
As you can see, I've cut the top of the wall at an angle. This should allow for an interesting effect at the top of the walls. At any rate, once we've got this done, let's go ahead and change this rather dull (and dark) texture into something different. While we're at it, we can also replace the caulk with an actual texture.
First, the large part of the wall (the lower half). I've decided to use the base_wall texture group, and this time I'm using the concrete texture. This should lighten things up a bit. Next, I'm going to texture the top portion of the wall (what we just cut). I'm still in base_wall, but this time I'm choosing the 'patch10' texture, which looks very similar to concrete but is lighter. This should allow for a more engaging texture scheme. When you're done, the result should look like this:
Texturing the wall
Now we're going to duplicate this with the other wall to maintain some semblance of uniformity. I'm not going to go over it all again...just consult the above and apply that to the opposing wall.
You may have noticed that this broke our enclosed area. It's no longer closed off from the void, so we're going to have to remedy this situation. The first thing I'm doing is resizing the sky to match the new dimensions. Simply highlight it (shift-click) and drag it out so it meets up with the walls correctly. I'm going to refrain from offering another screenshot detailing this. By now, you should be fairly adept at resizing brushes appropriately. If in doubt, fly around in the viewfinder and make sure there are no holes.
Next, we're going to make the OTHER walls fit correctly, thereby sealing our room in once more. To do this, highlight both of the walls (left and right in the top view). To simplify matters, I'm cutting them at the height that our walls deviate from pure vertical. Since it's the same height, we can cut both walls simultaneously, saving us some effort. For illustration purposes, a screenshot follows.
Cutting the walls
Now we're going to deselect the lower portion of the walls, then drag the remainder out so they match the outside of the walls correctly. You may notice that there's some overlap...textures are positioned where they will never be seen. To remedy this situation, once again I'll be doing some clipping. With the upper walls highlighted, all we need to do is cut along the same plane that our top/bottom walls are cut at. In this case, I see absolutely no purpose in keeping the hidden portion. Another screenshot detailing this procedure is below.
Some more clipping...
Once more, we have a sealed room. At this point you could save the map and compile it, if you'd like to see the effect of our handywork. Feel free to do this now. If you get any leak errors, you didn't join the brushes up correctly somewhere and left a hole. This should hopefully not be an issue.
With that out of the way, let's go ahead and retexture this ugly floor. Highlight the faces (ctrl-shift-alt-click), then go back to textures. I chose 'metaltechfloor01final' as my floor texture. Our spawn room is looking rather monochrome, but it's better than what we had previously. If you'd like to texture the front and back walls at this point, feel free to do this, too. I went ahead and textured them with concrete.
Next, let's add some more detail. By the time you're done with a room, it shouldn't look so empty and barren. The more you can bring your level to life, the better. Of course, this is to taste. Perhaps you'd like a level that's large and barren. Regardless, I'm going to add a more interesting ceiling to this place.
First, I'm going to draw a brush that will reach from one wall to the other. I'm doing this in the top view (top right window). Rather than go play-by-play, I'm just going to drop a screenshot on you.
The start of our rafters
You may have noticed it cuts into our wall brush. To fix this, clip it, of course! I'm not going to cover that...clipping should soon be second-nature. Also, while we're at it, go ahead and texture the whole thing as caulk. We're going to be clipping it up into peices, so it's much easier to do the whole thing now then do a dozen brushes later. Regardless, once it's clipped, manually select the three, visible sides, and retexture them. I've decided to head over to the 'organic' texture group, for some variety. I've chosen 'trainpart12c' as my texture. Look kinda funky? Well, it's time to dive into textures a little deeper.
Go ahead and deselect the down-facing side (ctrl-shift-alt-click it). I like the way it looks, but the sides need some help. So, time for something new. Press 's' on the keyboard, which brings up our surface inspector. What this lets you do is change the way textures look. You can rotate them, resize them, and several other interesting things. What we're going to do is simply rotate them 90 degrees. Find where it says rotate, and type in 90. You could, alternately, click the up and down arrows, but that's just tedious.
Once you have the number in there, hit 'done'.
Now for a quick aside. The surface inspector was a tad quirky in a previous version of GTKRadiant (the one I built TheMote and Satisian Fields in). If you hit apply, and occasionally even when you hit done, it decided to duplicate your brush. Sometimes numerous times. So...if you're moving your viewfinder around and notice an odd shimmering effect on something you just used the surface inspector on, try saving it, then highlighting the brush and deleting it (backspace). If it's gone, well, ctrl-z to bring it back. However, there may be an identical copy below that. Whenever this problem surfaced for me, it made SEVEN copies of the brush. Rather aggravating, but hey, it's free.