


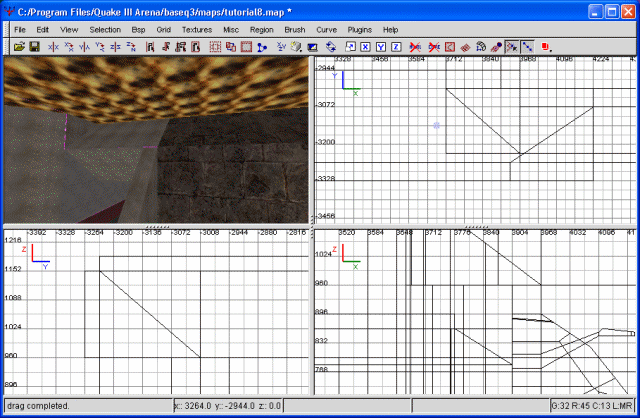
Let's go ahead and concentrate on the mid (main) bridge. This is still quite plain and needs some major work. The first thing I plan on doing is elevating it a bit, so I've selected the bridge itself, as well as the area when it fans out. I clipped this so I wouldn't have to worry aout the main entrance. Since we put that little wall in, without clipping it I would have had to do a bunch of work to get that to fit right again. Rather than deal with it, I clipped it. Pragmatic, eh?
Regardless, I took the remaining brushes and elevated them some. This gives snipers an easier shot against people using this bridge. However, it also masks people some that aren't quite at the bridge yet, allowing other snipers or marines a better chance at taking anyone in the sniper nest out. Having elevated it, I'm now clipping the front chunk at an angle. This will serve as the ramp onto the bridge.
What about our light, you may ask. Good question. Rather than remove it, I've decided to just dig it a recess. This will help keep it from getting in people's way, as well as maintain the light source.
The first bridge
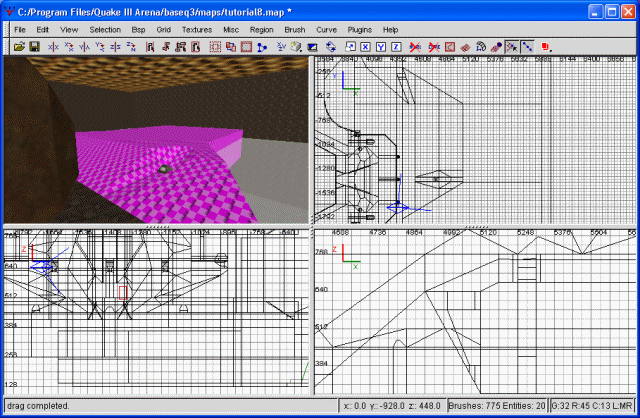
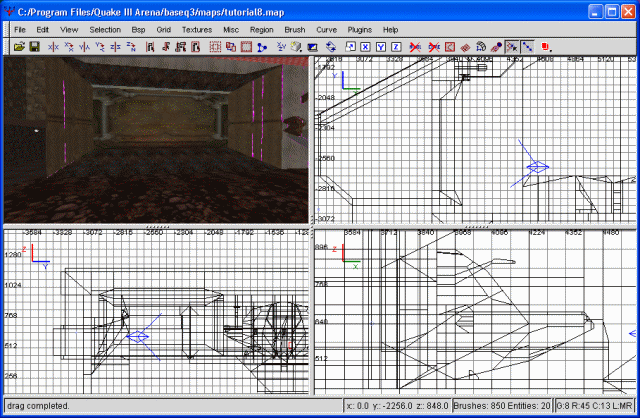
Okay then. Next for the bridge thickness. I like my bridge thin and dainty looking, so first I'm going to expand the bridge brushes (including the one we clipped off earlier) downward. Following that, I'm clipping the whole group at an angle from the bottom, inside, up to the bridge proper. This makes for a large "support" up to a rather thin bridge. All that's left after that is clipping the actual bridge to the same level. The way I've done it, the bridge now clears the water. Aren't you glad we weren't clipping up the water brush earlier?
As you may have noticed, our bridge is rather plain. I toyed some with the idea of putting arches over it, but besides the needless triangles it would also look pretty wierd since the bridge is so wide. Instead I've opted to just put some small "ribs" up along the side of the bridge. A screenshot is in order.
The riblike structures
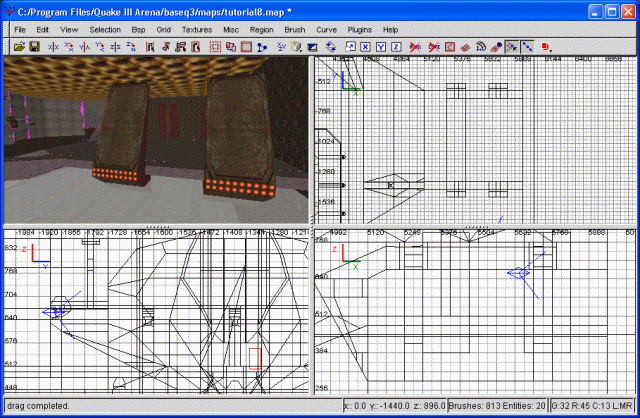
You may have noticed some lights on the backside. I also put some underneath the bridge, to light that area up. The sky we chose happens to be pretty dark, and without all these lights midfield would also be dark. This should be avoided, as it's just frustrating to blindly run into some mid-assassin and get knifed, or have a sniper standing in the shadows taking potshots.
I also uncovered another bug. You remember the main entranceway to midfield? More specifically, we caused the wall to slowly drop off and angle outward. Well, viewed from certain places, some of the textures (ground and inside of the wall) disappear, revealing either the water underneath or the hall of mirrors effect. Obviously this is a bad thing. Precisely why it did this I really don't know, but now that it's here we need to fix it.
Rather than mess with it too much, I decided to just delete the problem. Our wall has thus been scaled back, and I've put a solid ground brush in its place. We could have played around with the brush, perhaps rebuilding it from scratch, or clipping it at a different angle. Any of these may have fixed the problem. Or not. Rather than waste 30 minutes messing around, I'm just removing the issue altogether.
Alright then, with that we're nearing completion of the midfield. Both bridges are done, as is the balcony and the primary entrance to the red base. What next? Well, I don't particularly like the square nature of our water area. Let's make the edge into a slope, instead. So, to begin with, I'm deleting our little bottom filler brush. No need for that anymore. We could take the existing brushes for the 'ground' and just extend them out and down, but considering the number of brushes and some odd shapes, I've opted to just begin anew with a fresh brush. After texturing our 'soon-to-be-hidden' brush faces with caulk, I'm just going to draw a very large, rectangular brush, then clipping it at the angle I want.
Once done with that (the easy part), it's time to clip all our now overlapping brushes from the bridges so they border on this new slope. This actually isn't too difficult; just a matter of highlighting all the overlapping brushes and clipping them at the same angle. Don't forget the side walls and our floor brush.
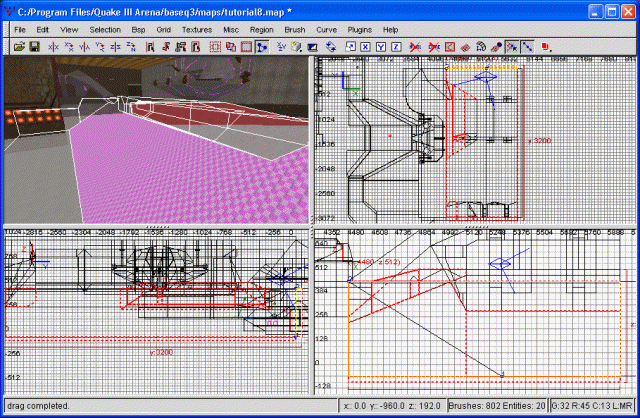
The slope
Finally, we need to clip the slope itself so that it doesn't have any hidden textures of its own. This is a bit more time consuming, but worth the effort, I assure you. This is the same sort of thing we've been doing for most of the rest of the tutorials, so I'll leave the specifics up to you.
Excellent, now we have a slope. Since this slope brush is so big, it adds quite a bit of brush volume. This, in turn, will slow down compiling. To minimize that effect, I'm clipping down the size of the brush a bit on the side noone will ever see (the side facing the void). I'm still leaving a nice chunk of insulation, so don't get too carried away. If you have an especially slow computer, you may want to do this to the rest of your large brushes as well. We left quite a few of these floating around our courtyard, for instance.
What's our next step, you ask? How about those walls. The earth tone thing just doesn't do it for me. Instead I'm going to texture it with a nice, dark brick texture. The bottom half (the half that's basically submerged) I'm texturing with gothic_wall/streetbricks14. I've resized the texture to 2x2, rather than .5x.5. This way I keep the repetitiveness of the texture down. Additionally, this isn't an especially repetitive texture anyway. Seeing patterns in really large areas kinda bothers me. The top part I textured with gothic_block/pulpywalla. This is the area above the water, in case you haven't caught on yet. I resized this one to 2x2. Please note that I'm not retexturing our side (courtyard) entrance yet. This will all change when we rebuild this.
Speaking of the courtyard entrance, that sucker's going to have to wait until the next tutorial. At 4 pages, this one's becoming a tad unwieldy. Speaking of repetitive textures, by the way, I've decided to retexture the 'ground' in front of our base as well. This I've done with organics/dirt2, which I've then resized to 2x2. The slope (which is concrete) also got the 2x2 treatment, as did the 'floor' in the water.
Next we're going to do something really short and sweet. I think the water is pretty blah personally. The crystal clear look just doesn't fit the level very well. What I want to accomplish is a cloudy look. At the same time, I don't want it to be too dark. So, what to do? Fog of course! The first thing to do here is just select our water brush. The fog will be exactly the same size, so just copy and paste. Next, texture the whole brush with sfx/fog_timctf1. This is a very bright, white fog. By doing this, we singlehandedly managed to make the water cloudy and brighten up the midfield some more. Easy as pie, eh? Of course.
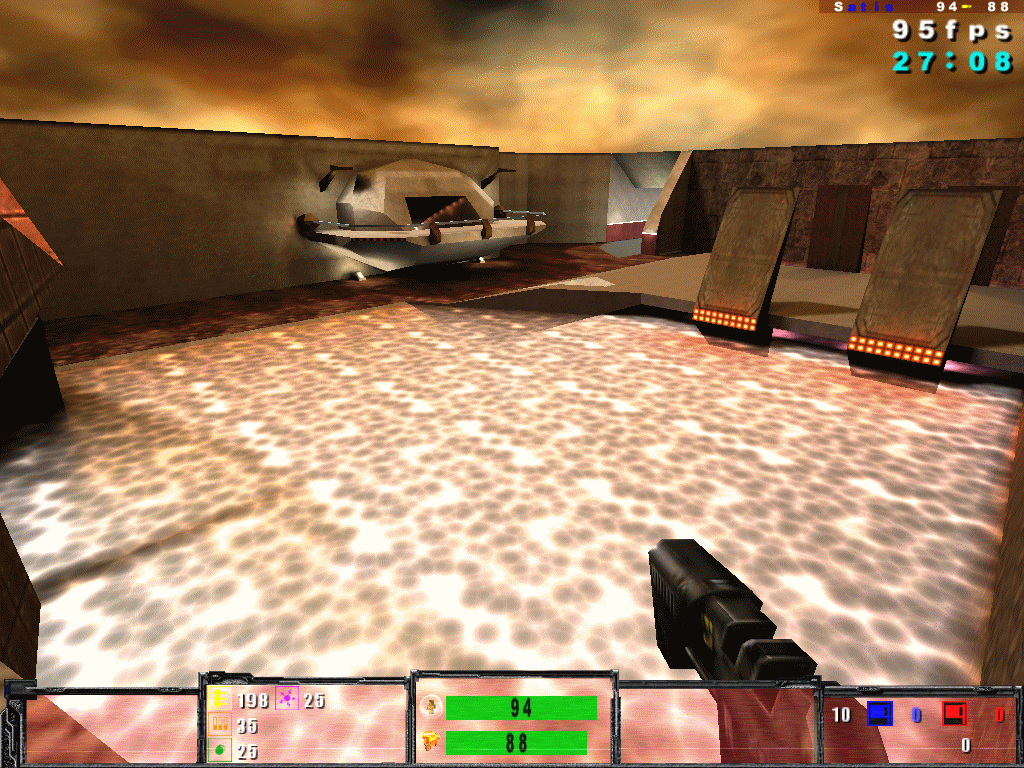
Foggy water is happy water
We are practically finished with the structural aspects of our midfield. There's not a whole lot really left to do here. However, there are a few things I would like to polish up before we call it a day. First, you may have noticed how our world just kinda suddenly ends, and the sky begins. This isn't technically a problem, really, but I just don't like the way it looks. The main entrance is the most glaring problem regarding this (just refer to the above screenshot). So I'd like to raise our sky up a little and make the transition from world to sky a bit more natural.
The way I did this is by just adding some more brushes to the top of existing ones, and having them slant out. This should be enough to provide an illusion of continuity. I'll supply a screenshot that shows what I did.
Making things neater
Most of this was pretty easy to accomplish, though the "curved" portion of our wall was a bit more difficult. Still, it's all just a matter of thinking creatively and being able to use the clipping tool, so I'm sure you'll be able to make it. Now that we have this slanted look, I want to make sure noone can actually get up there. Of course, this is personal preference, so you can do what you want. All that this requires is a single, large playerclip brush.
When you get to our curved area, you'll need to be creative again. You may be tempted to just let it slide, but don't. A certain other map in WFA's history (*cough*observatories*cough*) had a playerclip brush in midfield, and a hole. What eventually happened is that everyone would get up on top of this brush and shoot down at the other team. Very boring, very annoying. Don't fall into this trap. The good news is you don't have to be exact. A character model in quake3 fills up a nice chunk of space, so leaving small holes isn't really a big deal. Just don't leave a hole big enough to fit through.
Great, what next? How about we mix the textures up some more? Take a look at the front wall of our base. Pretty boring. The area directly around our balcony is fine, since the balcony itself breaks it up. However, the curved area and straight areas on either side could really use some spicing up. We're not going to do anything fancy. We're just going to clip it up a bit and put more of a variety of textures on these faces.
To begin with, if you check out the straight wall, you'll notice we actually have three brushes there, left over from when we were building our balcony. I went ahead and deleted these, replacing them with a single brush. Then I began clipping. See the result below.
The new and improved wall
Our midfield is starting to become very complex. Though this certainly increases the eye-candy value, it also increases the number of triangles that quake has to draw. This, in turn, translates to lower framerates. A tutorial covering this more specifically will be coming up, but for now just keep it in mind. We're to the point now that we really don't want to add too much more detail. As a result of this, I'm leaving the curved portion of our wall alone for right now. In fact, I may be removing it entirely sometime in the future.
And with that, our midfield is pretty much done. The side entrance remains to be dealt with, but we'll get that in another tutorial. We can't really tweak the entrance without finalizing the passage itself. Personally, I really like what we've come up with.
As always, feel free to grab the final map file below.
The tutorial 8 map file.