


With the last tutorial, we built the flag room, or at least as much as we could do before finalizing where we're going to put the entrances. There is a school of mappers that will tell you to plan all this out in advance... everything from the size, orientation and construction of your flag room through the rest of the entire level. They will encourage you to sketch it out and get a very firm grip of precisely what it is that you want to accomplish with your map. This, in all honestly, is probably a good idea, but it's not how I work. If that sounds more like your style, by all means, indulge it. However, this is my tutorial, so you're going to do what I say. :)
Regardless, there are some basic rules to follow in map building. Like most rules, these can be broken at will, but beware of what problems you may be creating for yourself (and your map). The rule I speak of specifically is that there should be three equally viable entrances to the flag room. Additionally, it should be impossible to cover all three entrances from one position. This is supposed to encourage teamwork, and cut down on turtling. So, I'm going to go ahead and follow these rules.
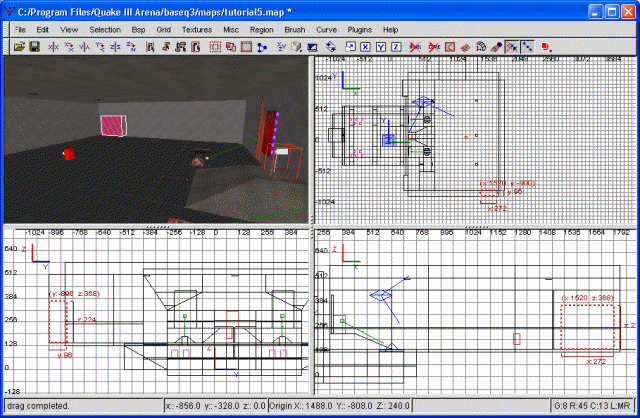
The first entrance we're going to make will be at the 'north' side of our flag room. This is the 'uppermost' wall, as seen in our top view. The entrance will be at ground level, and large enough to accomodate a large attacking force. It's important to keep the passages relatively large...otherwise, a single gunner could turn a small hallway into a death trap. However, enough talking. First, I'm just going to draw a brush to show you where precisely I'm placing the door. Please ignore it. I'll be deleting it immediately. This is simply to show you the position I'm choosing.
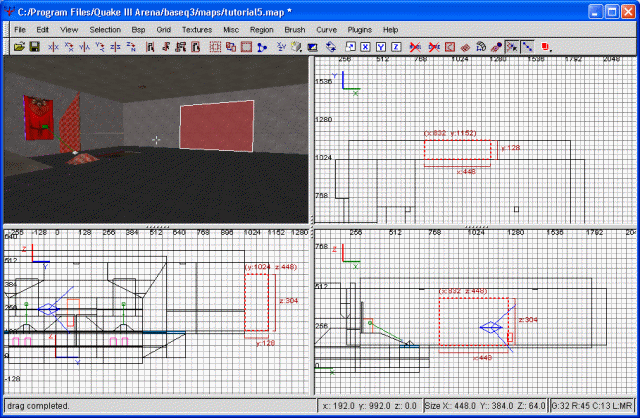
Where I'm placing the first doorway
Alright. We've got a great deal of experience now with the clipping tool, so let's begin. After deleting my little temporary brush, I'm going to go ahead and clip the wall first vertically to define the sides of the door, then horizontally to define the top. Following that, I'm removing the center brush (you can just lose it in the last clip, of course), and voila, we have a door. Of course, we've also opened ourselves up to the void, but so be it.
The first doorway is cut
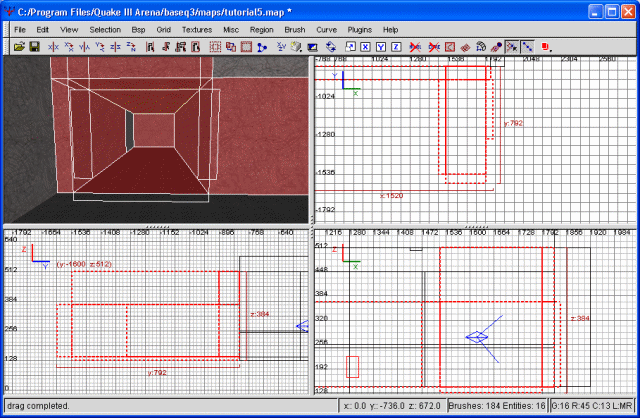
We may as well extend this into a hallway now. As you may have noticed, the floor isn't exactly right, so I'm starting by drawing a floor brush. I'm going to make it extend a fair distance straight out, though you don't want it to go TOO far out. I leave this to your discretion, of course. I'm also going to draw out simple walls and a ceiling to complete our hallway. Please note... our hallway is going to turn 'east' at the end (right in the top view), so I'm not extending the right wall out as far as the rest of the brushes. I went ahead and textured all the sides, as well. Yet another screenshot, in case you need visual reinforcement.
The first hallway
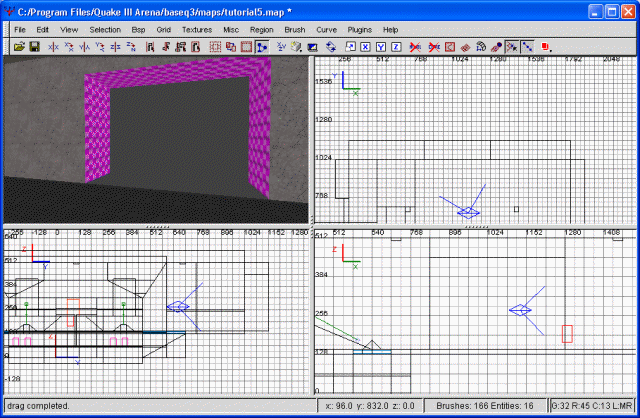
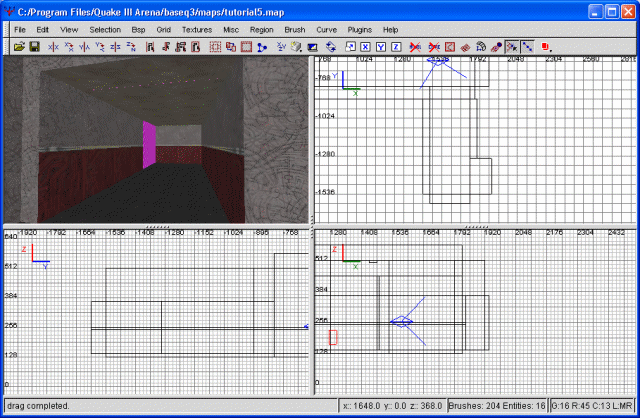
Outstanding, we're virtually done with this hall (at least for now). First, let's go ahead an plug the leak with a quick caulk brush. This is temporary, but will allow us to compile the map and check out what we've accomplished. Youmay have noticed that we now have some sections of hallway that are textured and obscured. Go ahead and fix this with some cutting. Additionally, I'm going to cut the walls horizontally in the hallway to put in a thin light strip on each side. This will keep it from being pitch black. Having accomplished this feat, I'm also going to texture the bottom of the wall red, to underscore the fact this is, after all, the red base.
For the lights, I've decided to use the base_light/light5_15k texture once more, rotated 90 degrees and stretched vertically to 3.5. For the bottom part of the wall, I've decided on base_wall/metalfloor_wall_10 for some variety. Here's a screenshot to help solidify what it is I'm talking about.
The first hallway, some more
Go ahead and compile the map and took a look around. You may notice how incredibly massive that hallway is. Well, let's go ahead and call this the primary entrace to the flag room. A sentry or gunner could easy cover this hall from relatively near flag, but it's large enough that there's still plenty of maneuvering room. Also notice the huge HoM effect produced by our caulk brush. That is why you don't EVER want caulk showing in your maps.
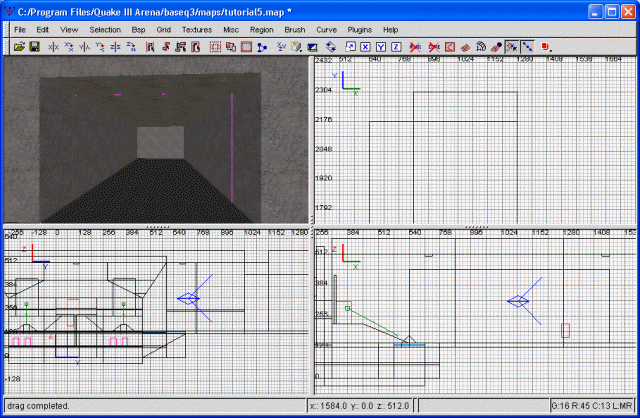
Now we're going to place the second of our three hallways. This one will be smaller, but will be oriented in such a way that it becomes more difficult to cover. Due to the size of our first hallway, most attackers will probably pour from that side, diverting defense away from the other two entry points. In this case, the entry will be from the south east corner (bottom right from the top view). Allow me to demonstrate with another screenshot before going on.
The second doorway, before clipping
Alright, let's go ahead and clip the door. Once more, I'm starting with two vertical clips to define the width of the door. After deselecting the brushes I don't need to mess with anymore, I'm then cutting it horizontally to determine the height. Finally, I'm deleting the center brush and opening our level back up to the void. Congratulations, we have yet another doorway.
Since this is our second rendition of basically the same procedure, I'm going to go ahead and draw a floor heading straight out, just like before, as well as floors and a ceiling to help define our hall. Once more, I'm going to shorten the 'east' wall a bit to allow for a 90 degree turn in the hall at that point. Don't forget to cut the sides of the doorway, so that no textures are hidden. Another screenshot, I believe, is in order.
The second hallway
Like before, I'm going to cut the hall twice horizontally, to make room for lights and so I can texture the bottom part of it red. However, this time I'm going to use a dimmer light. The hallway is much smaller, for one. Additionally, this will end up being the hall that spies will most often use to sneak into the flag room. Though I don't want to help the back-stabbers out too much, I'm willing to mute the lighting a bit and give them a hand.
I'm using base_wall/metalfloor_wall_10 again for the red part of the walls. For the lights, I'll be using base_light/light5_3000, rotated 90 degrees and stretched, once more, to 3.5 vertically. As before, I'm plugging the void hole with a caulk brush. This will allow me to see what I've done, and if there were any mistakes I can fix them before they become too much of a pain.
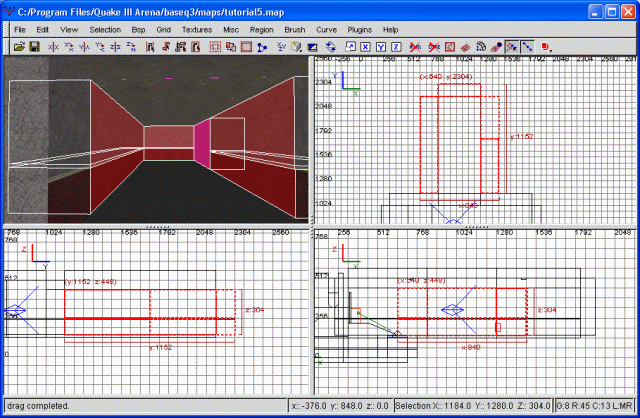
Having compiled it myself, I'm happy with the outcome. The passage is much more human sized, and not massive like the original. Additionally, it's a bit dim without being downright dark. Overall, I'm quite satisfied with what we've created thus far. Allow me to drop a screenshot of the finished product.
The second hallway, part deux
Excellent. Well, two out of three entrances to the flag room are finished. Let's go ahead and do the third, shall we?
We're going to mix things up a bit with this third entrance. Rather than have it floor level, like the rest, we're going to set it up some. Unfortuanetly, the ceiling is just a tad bit low for us to make a real balcony entrace. So, rather than make a whole lot of alterations, let's just edit the ceiling a bit.
The third entrance, a balcony entrance, I've decided to put on our 'front' wall, which is the 'east' one in our top view. I'm going to begin editing the ceiling by making it considerably thicker. I don't want to move the brush, simply making it so it's about three or four times as thick as it was previously. Following that, I'm going to make a vertical cut along the north/south plane (in the top view, up and down). I'm placing this a little cut directly above the flag. This cut will serve as a starting point for a gradual, inverted slope to our balcony entrance. Sound confusing yet? Well, follow along, I think it'll make sense by the time we're done.
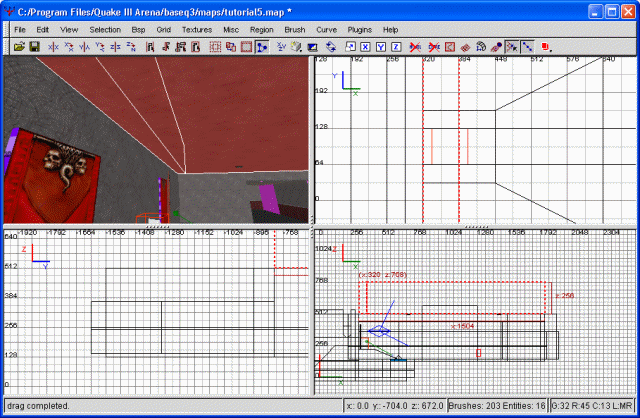
The first cut in our ceiling